Drawing a Venn Diagram
[
1 of 3 Next →
Table of Contents
Context
I had math students struggling with set logic problems and venn diagrams. I needed a tool to use as a visual aid during tutoring.
Turns out, it’s hard to develop an interactive venn diagram! It’s hard to create independent behavior for each region, and it’s hard to organize the code. This series chronicles the journey to an elegant solution.
Feel free to play around with the latest version of this interactive venn diagram tool, or use it for reference as you read along.
Project parameters
-
I’m focused on 2 and 3 set venn diagrams because that’s what my students see. Does anyone really benefit from 4+ set diagrams anyways? They’re chaotic. It would be a fun proof of concept though.
-
The main feature I wanted was the ability to select different set combinations. That’s vague, so I defined what that entailed as I went along.
- I did not care about numbers or labels or categorizing items. Other tools exist for those purposes, but I wanted to focus on visualizing regions. And I particularly prefer teaching aids to be simple and clutter-free (eg no buttons) (like my whiteboard)
- I did not care about numbers or labels or categorizing items. Other tools exist for those purposes, but I wanted to focus on visualizing regions. And I particularly prefer teaching aids to be simple and clutter-free (eg no buttons) (like my whiteboard)
-
I used the graphics library
p5js, which is good for creating and sharing code sketches in the browser. It helps to be familiar with its globals and flow of execution.
This post addresses the first challenge:
How to display each region?
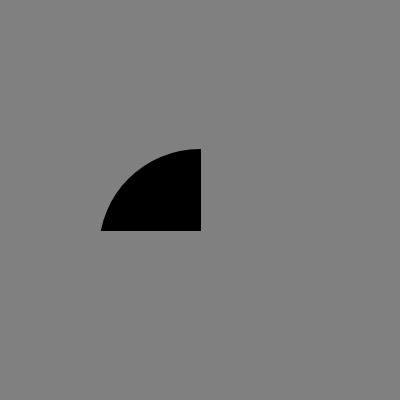
For example, how would you draw this region? A ∩ B
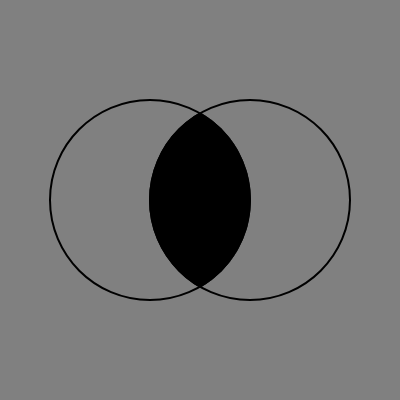
Let’s investigate some options and rough draft what the code would look like:
Option 1) Math
A ∩ B is enclosed by circle arcs, so we can define them with some trig, create a closed region, and fill it.
If you’ve never defined an arc before, know that you’ll need an ellipse, a start angle, and a stop angle. See p5js examples.
To show A ∩ B:
A, B = circles
arcs = [ arc(A, -pi/3, pi/3), arc(B, 2pi/3, 4pi/3) ]
closedPath = join(arcs[0], arcs[1])
region = closedPath.fill()
I like how…
-
It feels like there’s a path library to implement these unique geometries (not
p5jsthough, I couldn’t find a way to create closed/fillable curved paths.beginShape,beginContour,curveVertexdon’t seem to cut it) -
There’s probably an algorithm to generate all those arcs, because there’s always patterns if you look hard enough
But…
-
That algorithm wouldn’t be very intuitive, because
-
It seems impossible to come up with a good way to organize the arcs.
A,B,AB1,AB2?ABC12,ABC13, … Anyways, -
I have an inhibition to using other libraries in situations like this.
Option 2) Masks
Maybe A ∩ B reminds you of image manipulation / clipping / masking (mostly referred to as masking from here on):
If we can make a mask for each circle, then to show A ∩ B:
A, B = circles
maskA, maskB = clippingMasks(A, B)
maskAB = maskA.overlapping(maskB)
region = maskAB.fill()
I like how…
-
The code reads similar to what’s being output. I think that’s what they call declarative
-
It should extend nicely to other
A/Bcombinations, and also to 3-set Venn diagrams
But…
-
p5jsmask functionality is limited (you can only fade blue over an astronaut). I’d have to mix in my own features, or -
I could probably find a library for clipping masks, but I still have that hangup about using other libraries when this is within reach.
Option 3)
I see no other options. I decided to use masks for the sake of sane code. Happily, that choice led to fun coincidences and cleaner code throughout the rest of the project.
Post-project, I tried to see how others have solved venn diagram drawing. Some solutions were too hard to understand and I gave up, but none of them fully satisfied the main condition of drawing any region on demand. Maybe you have another idea? Here’s the highlights of my search:
-
a top google result,
venn.js(demo). Good for most use venn diagram cases, but not good enough for highlighting every region independently. Unable to hover smallest subsets as far as I know, eg “radiohead only” in the demo. I think this occurs as a limitation of using a z-ordering/css solution. Kudos for implementing the ever-elusive borders, and kudos for a non-raster/zoom-friendly solution! -
one person’s portfolio widget, using math I gave up on, built off
venn.jsandd3.js. Same shortcomings, missing the smallest regions likeA ∩ B ∩ C'on hover. -
someone’s old jquery plugin (demo). Unique shading solution by calculating lines that extend to ellipse edges. Can’t shade region borders, sadly. Kudos for creativity and for extending to 4-venn!
With that settled:
How to mask?
Masking is possible in 2 ways: image masks or polygon clipping. Image masks are just bitmaps of alpha values for pixels, inputting and outputting images. Polygon clipping does vector math of intersecting edges, inputting and outputting polygons (collections of paths?).
Polygon clipping would take a lot of time to understand and implement (to get an idea, play this mesmerizing animation of the algorithm). I could find a library for it, but you might sense by now that I don’t want to use one.
I understand pixels though, so we can make image masks. Be aware that there are limitations that come from working on a pixel / raster level:
- uglier when zoomed
- slower
- no geometric attributes
- no concept of borders (foreshadowing…)
Boolean masks
Image masks could be implemented intuitively with boolean arrays. Each index would be on or off, 1 or 0. Masks would be combined by applying the operations AND, OR, or NOT to each index:
boolean arrays as masks

[1 1 0]     [1 1 1]   [1 1 0]
[1 1 0] AND [1 1 1] = [1 1 0]
[1 1 0]     [0 0 0]   [0 0 0]

[1 1 0]     [1 1 1]   [1 1 1]
[1 1 0] OR  [1 1 1] = [1 1 1]
[1 1 0]     [0 0 0]   [1 1 0]

    [1 1 0]   [0 0 1]
NOT [1 1 0] = [0 0 1]
    [1 1 0]   [0 0 1]
But looping through plain 2d arrays is usually slower than image classes because image operations get optimized at a lower level. I’ve been burned enough by painfully slow pixel looping to recognize this. In almost any other scenario, it’s better to start the first and easiest idea before thinking about speed and optimizing (one english teacher on writing: “Get it down, then get it good”). But this is a rare case where the slowdown would be unacceptable and I trust my intuition enough to skip this step.
Presumably, a better idea: scaffold off p5.Image. How can you represent on or off with RGBA pixels? Maybe black is off and white is on? True, they’re opposites, but they don’t handle visibility. An all-off mask should be invisible, not black. Really, opaque is on and transparent is off.
So let’s use the alpha channel of a p5.Image and existing image operations to create the same AND/OR/NOT interface:
p5.Images alpha channel as masks

[ 255 255  0  ]   .mask     [ 255 255 255 ]   [ 255 255  0  ]
[ 255 255  0  ]    (AND)    [ 255 255 255 ] = [ 255 255  0  ]
[ 255 255  0  ]             [  0   0   0  ]   [  0   0   0  ]

[ 255 255  0  ] .blend(add) [ 255 255 255 ]   [ 255 255 255 ]
[ 255 255  0  ]    (OR)     [ 255 255 255 ] = [ 255 255 255 ]
[ 255 255  0  ]             [  0   0   0  ]   [ 255 255  0  ]

manual  [ 255 255  0  ]   [  0  0  255 ]
invert  [ 255 255  0  ] = [  0  0  255 ]
 (NOT)  [ 255 255  0  ]   [  0  0  255 ]
-
p5.Image.mask does
ANDlogic with the alpha channel -
p5.Image.blend ( ADD ) will act as an
ORoperation on the alpha channel (255 + 0 = 255,0 + 0 = 0, and255 + 255caps out at255) -
I couldn’t find an operation to invert alpha channel values. p5.Image.filter( INVERT ) only seems to affect rgb values. So a quick
NOTfunction in pseudocode, manually looping thru pixels like we tried to avoid in the first place…invertOpacity(img) { for p in img.pixels: p.alpha = 255 - p.alpha }
That’s all you need to make a mask! Here’s the final implementation:
// defined in utils: transparent, clone, OffscreenRenderer, etc
//    see full source code for implementations

let newBooleanMask = (init) => {

  let img

  switch (typeof init) {
    case 'object':    // existing p5.Image
      img = init
      break
    case 'function':  // function to draw on a renderer
      img = OffscreenRenderer.render((pg) => {
        pg.background(transparent)
        init(pg)
      })
      break
    case 'undefined': // no args results in a blank, transparent image
      img = OffscreenRenderer.render((pg) => pg.background(transparent))
      break
  }

  return {
    // 'immutable' and chainable
    img: img,
    and: (other) => {
      let otherImg = clone(other.img)
      otherImg.mask(img, 0, 0)
      return newBooleanMask(otherImg)
    },
    or: (other) => newBooleanMask(addImages(img, other.img)),
    not: () => newBooleanMask(invertOpacity(clone(img))),
  }
}
A critical component is the masking workaround others have already discovered for p5js. Abstract circles can only mask each other with fancy polygon clipping calculations, but paint the circle onto an concrete image, and you unlock image masking.
It’s much like doing mental math vs doing scratch work; p5js can’t do the mental math of clipping, but put the shapes down on paper, and it can figure it out.
OffscreenRenderer is the reusable version of that solution; it’s used to render abstract shapes onto new images. Anytime the code references a pg, it’s defining what to draw on a new image.
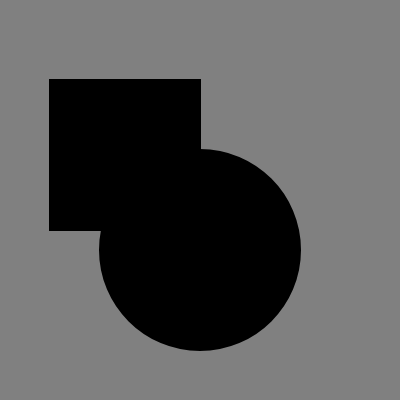
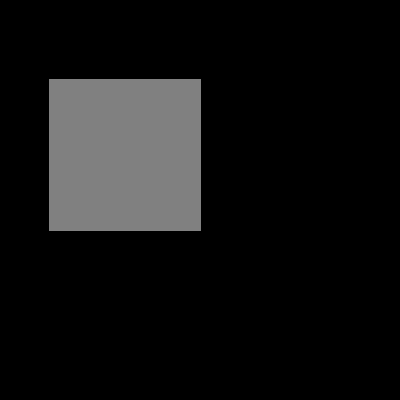
Let’s see the masks in action:
a = newBooleanMask(pg => pg.square(50, 80, 150) )
b = newBooleanMask(pg => pg.circle(200, 250, 200) )

putMask(...)
a.or(b) |
b.and(a.not()) |
|---|---|
 |
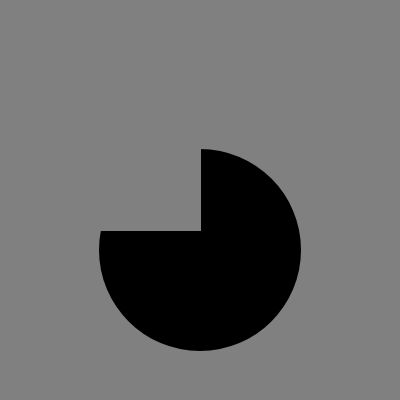 |
a.and(b) |
a.not() |
|---|---|
 |
 |
I’m proud of these! Chaining syntax is always fun. The methods (and(), or(), not()) are short and clear. Still a little cumbersome compared to operator overloading (&&, ||, !), but I’m satisfied enough to forgive javascript for now. You can make all sorts of shapes. Even the clipping animation from earlier was made with these. The only downside was that it ran at 10 fps, so make sure you don’t need realtime rendering with these masks.
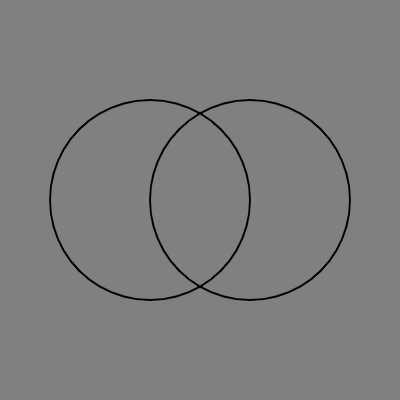
Putting it together
Let’s draw all the regions of a 2 set venn diagram. To start, we need to store circles and draw them:
initial circles and venn diagram code:
let newCircle = (x, y, r) => {
  let draw = () => circle(x, y, r*2)
  return {x, y, r, draw}
}

let new2DVennDiagram = ({center, radius}) => {

  let A = newCircle(center.x - radius/2, center.y, radius),
      B = newCircle(center.x + radius/2, center.y, radius)

  let draw = () => {
    A.draw()
    B.draw()
  }

  return {draw}
}

v = new2DVennDiagram({center: {x: width/2, y: height/2}, radius: 100})
fill(transparent)
strokeWeight(2)
v.draw()
Now to create all the subsets with masking and display them. Notable changes:
-
We won’t directly draw on the main canvas ever again (ie
circle); we’ll do all our drawing in advance with masks (iepg.circle) and display those images instead. -
Consequently, borders get their own images now.
-
Naming got a lot messier; before,
Awas only a circle. Now there’s circles and masks and borders, andAvs.A only.
code with masks and borders:
let newCircle = (x, y, r) => {
  let draw = (pg) => pg.circle(x, y, r*2)
  return {x, y, r, draw}
}

let new2DVennDiagram = ({center, radius}) => {

  let circleA = newCircle(center.x - radius/2, center.y, radius),
      circleB = newCircle(center.x + radius/2, center.y, radius)

  let maskA = newBooleanMask(sequence(_fill, circleA.draw)),
      maskB = newBooleanMask(sequence(_fill, circleB.draw)),
      maskA_only = maskA.and(maskB.not()),
      maskB_only = maskB.and(maskA.not()),
      maskAB = maskA.and(maskB),
      mask_outside = maskA.not().and(maskB.not())

  let borderA = OffscreenRenderer.render(sequence(_stroke, circleA.draw)),
      borderB = OffscreenRenderer.render(sequence(_stroke, circleB.draw))

  let draw = () => {
    putMask(...)
      // try maskA_only, maskB_only, maskAB, and mask_outside

    putImage(borderA)
    putImage(borderB)
  }

  return {draw}
}
Looks like we’re ready to make it interactive.
1 of 3 Next →